

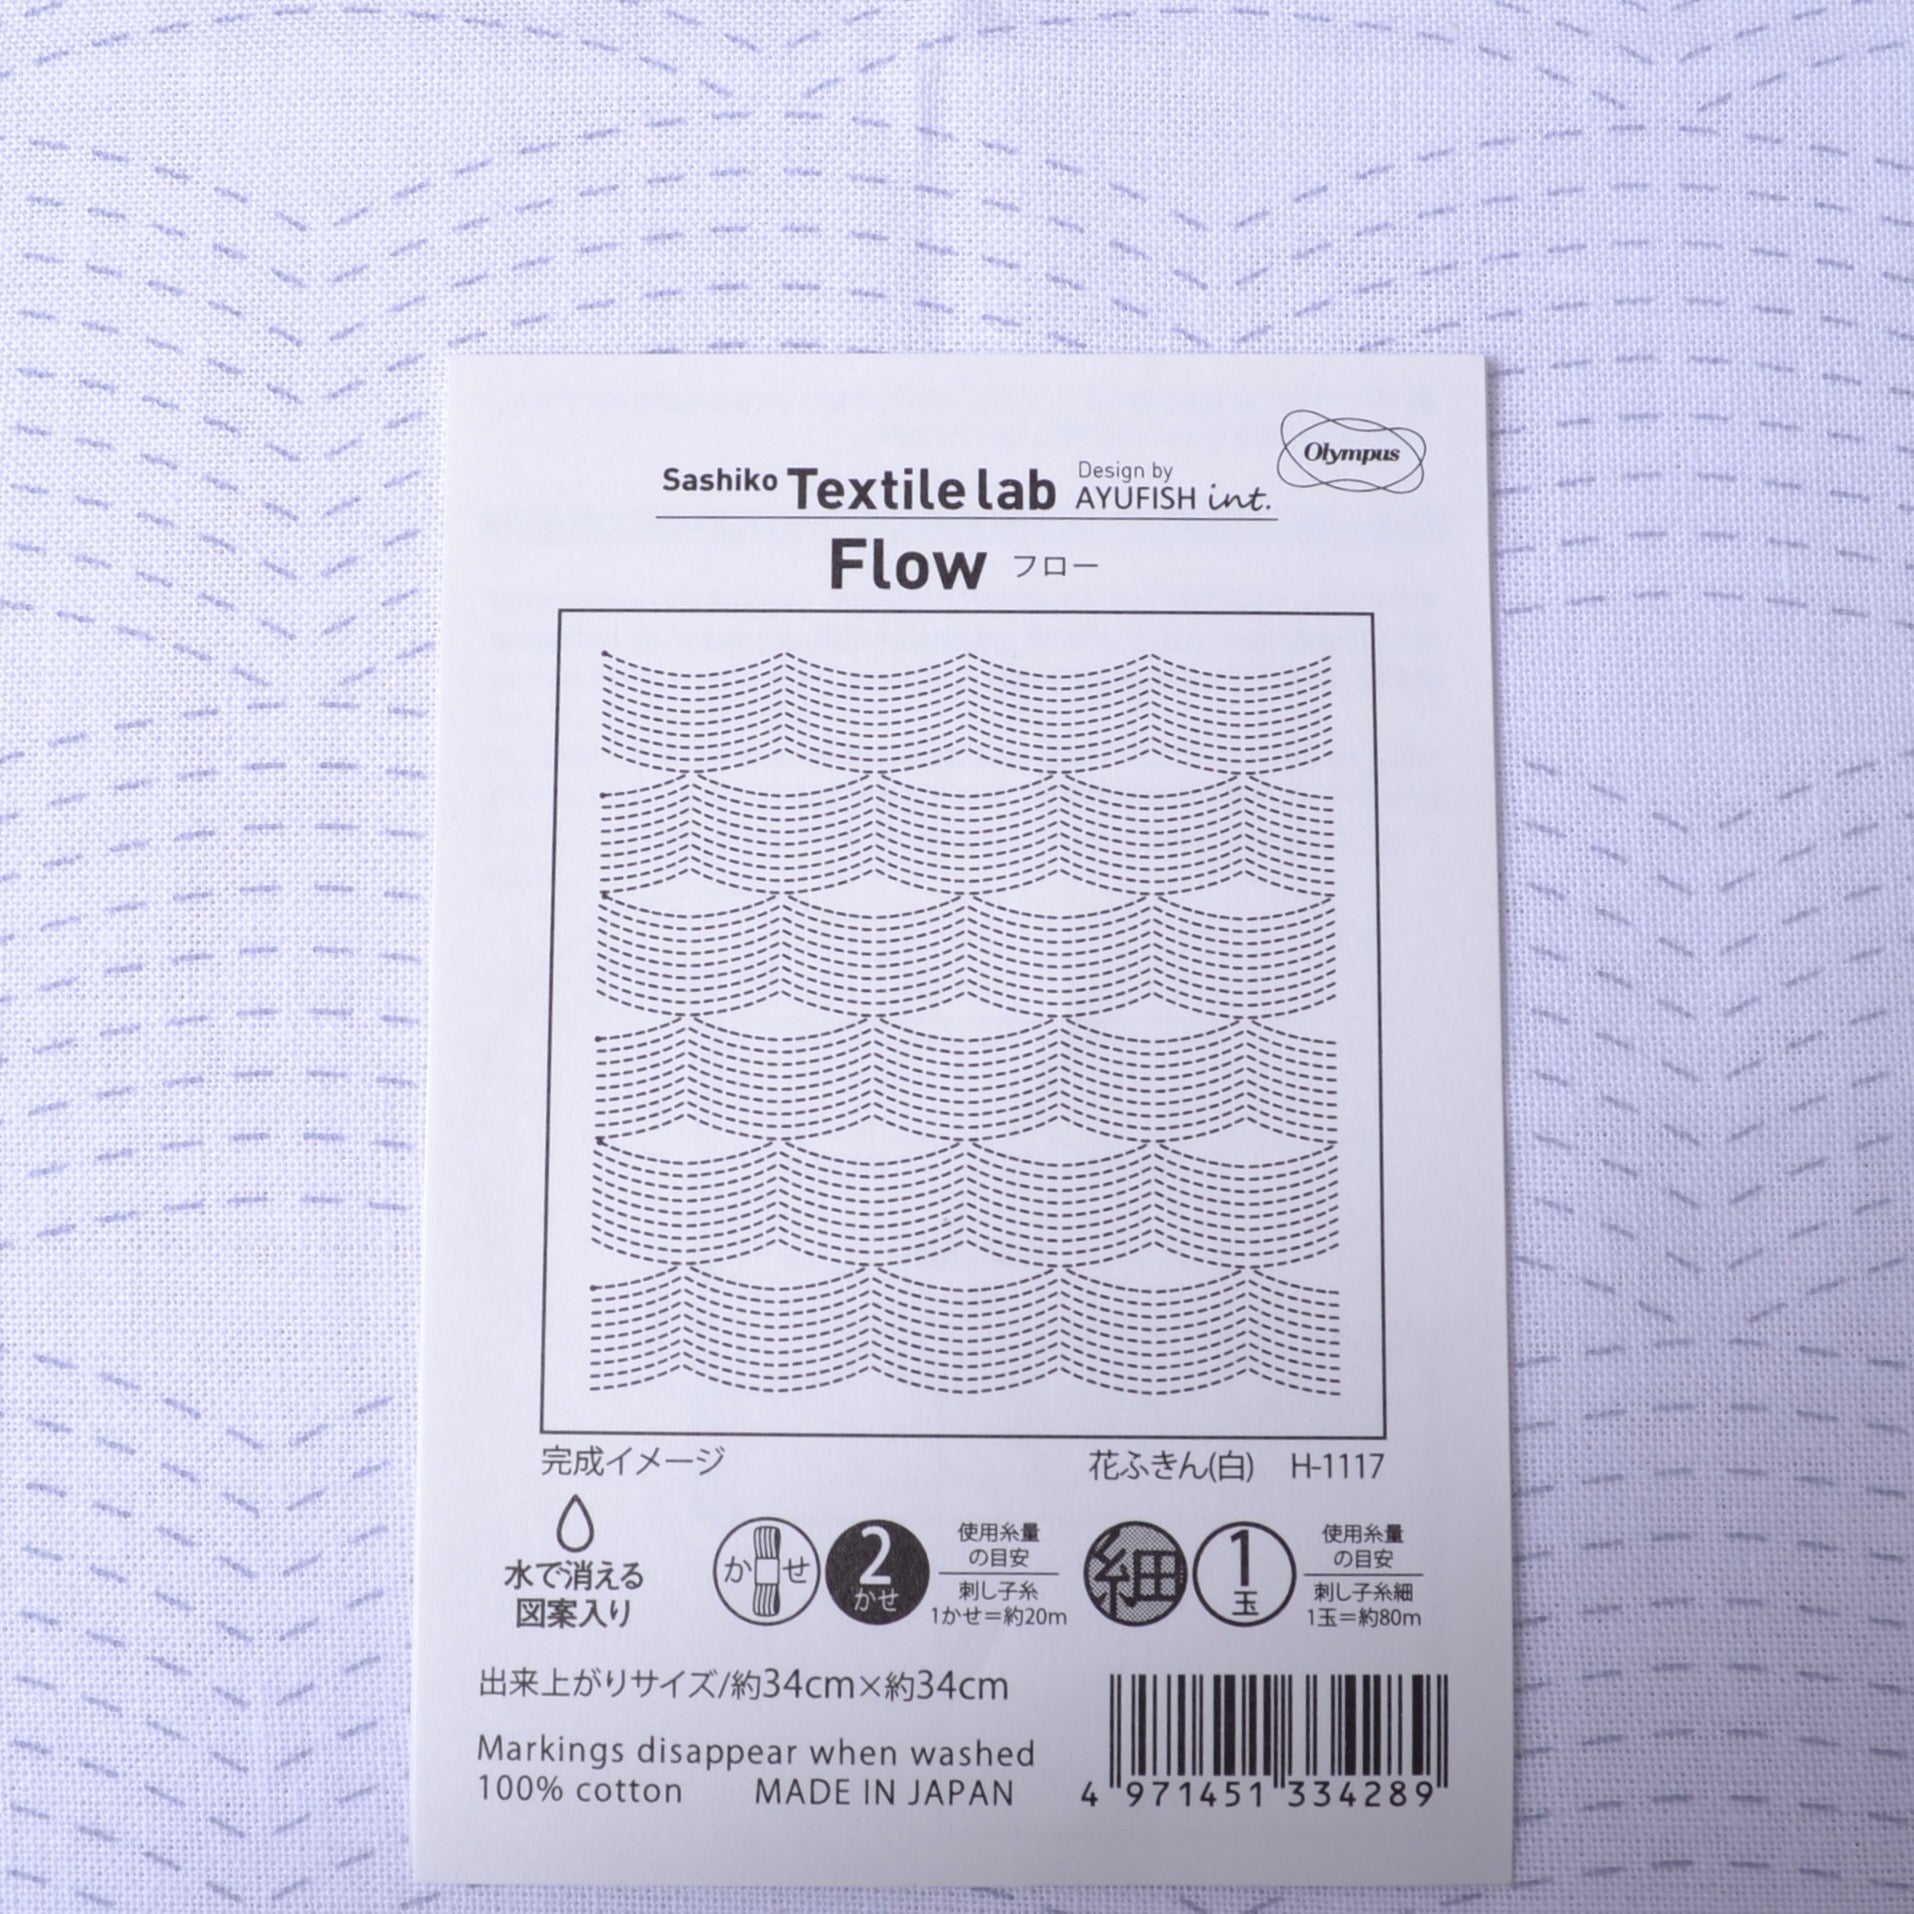
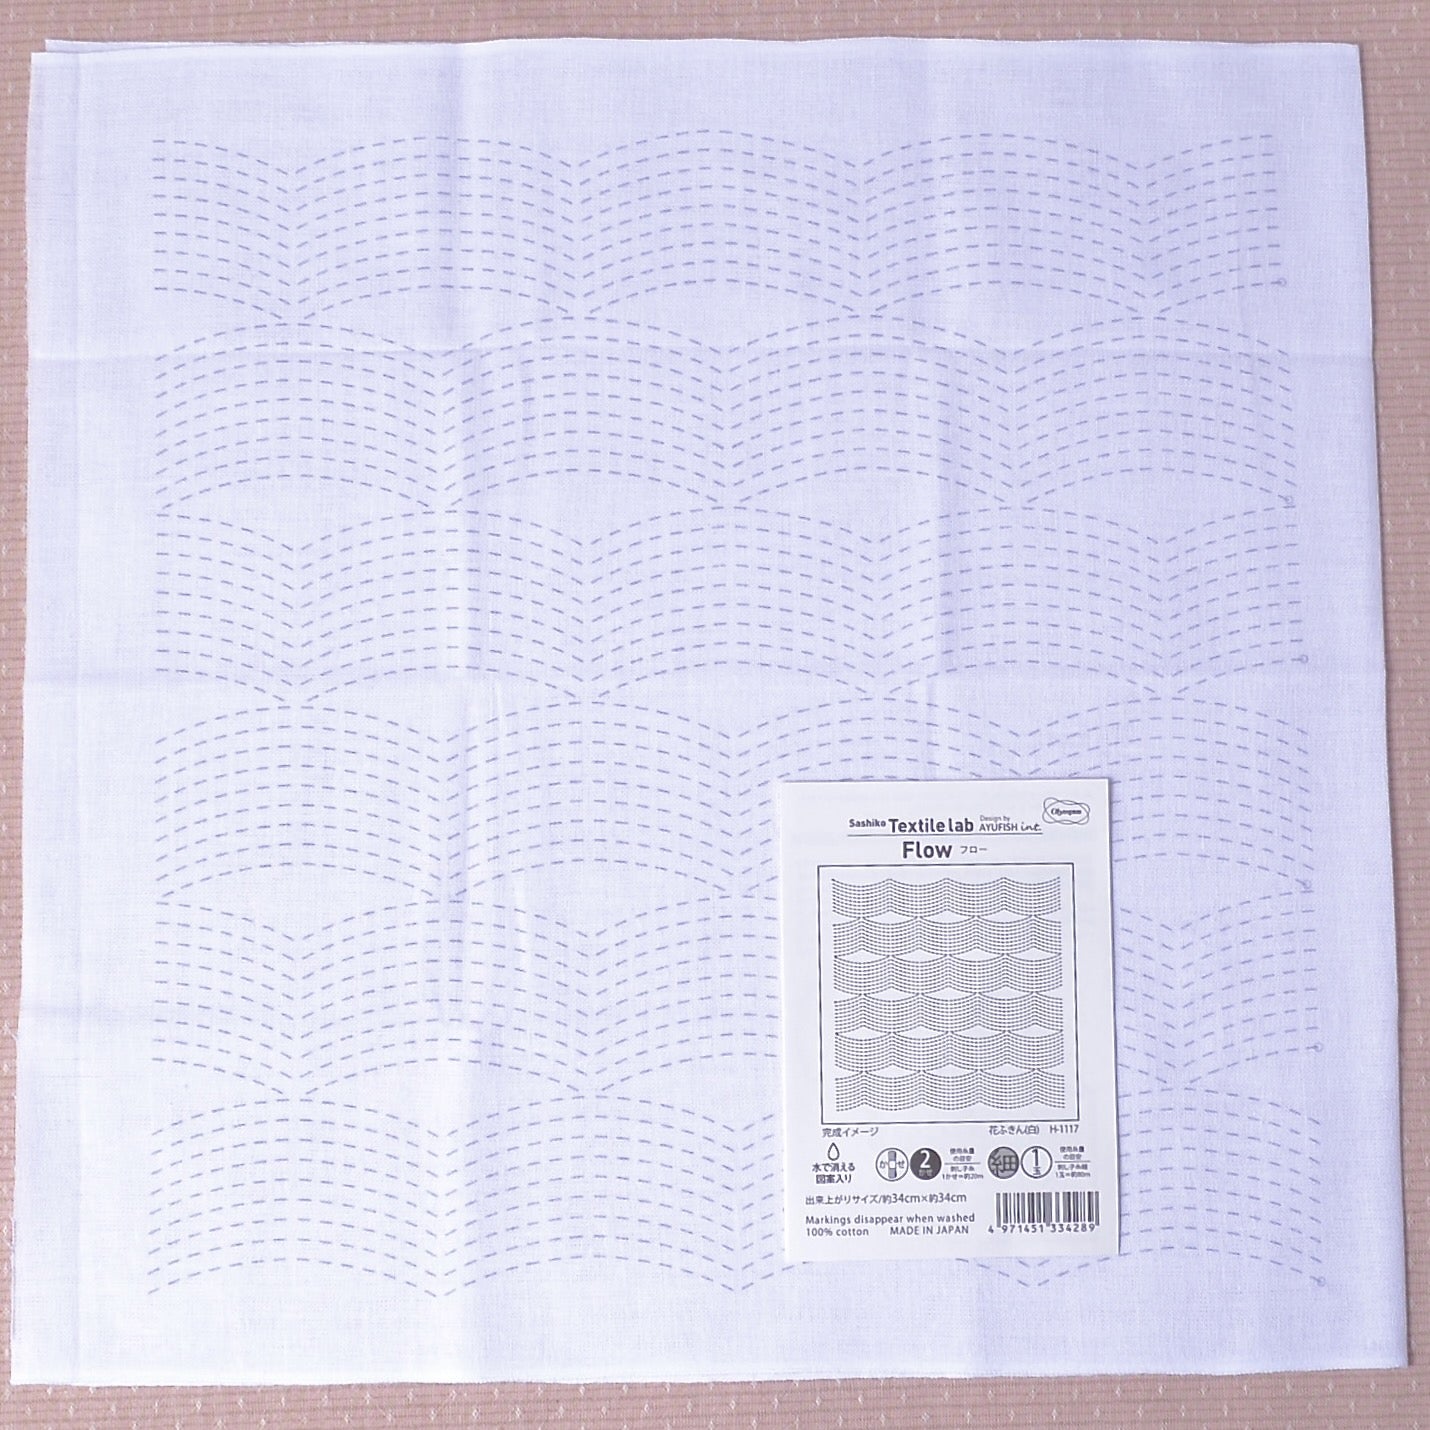
Sashiko Sampler Textile Lab "Flow"
$14.95
'Flow' is a beautifully simple modern sashiko design.
It is a perfect design for beginner sashiko stitchers to practice stitching. You simply stitch along the printed markings from one edge to the other until the design is finished. The printed marking will wash away entirely when you have finished your stitching. Note: Instructions are in Japanese but
Once you begin stitching these designs they are hard to resist! The stitching technique is so easy that it makes the a restful 'timeout' from stress, and the end results are amazing for something that is so simple!
- Finished Sampler Size: 13" X 13" (the white cotton fabric is 13" X 26". You are meant to fold the unprinted fabric behine the printed fabric and stitch through both layers
- Wash Out Design: when you have finished the stitching the design will wash out completely. Let it soak a short while in warm water, then rinse, towel dry and press from the back.
- Amount of Thread: 40 meters of Sashiko thread will be enough. I suggest buying 2 skeins in two colours of the Olympus 20 meter skeins of sashiko thread.
- Designed by Ayufish int. for Olympus in Japan, these are printed on the same cotton fabric as the Olympus Sashiko samplers you are familiar with.
Things you need to know before you start a sashiko sampler:
You can use any of the sashiko threads and needles for these samplers.
You can start your stitching with a knot and after that weave your threads under a few stitches on the back of the cloth. There are other methods, but this is a good way to start I think.
All the sashiko samplers from Olympus Japan are printed on the same sarashi-momen cotton fabric (Olympus Hana-fukin & Traditional Sashiko, La bouquetiere, Ayufish int. Samplers). This traditional 100% cotton Japanese fabric is woven on the traditional width narrow looms. This means it has selvedges on two edges. The 12" x 12" design is printed on a 26" length of the fabric and you are meant to fold the unprinted half to the back of the printed half and stitch through both layers.
The printed design will disappear completely in water so keep it dry until you are finished. Also do not iron before it has been washed.
If you would like your cloth to have finished edges, fold the cloth in half with the printed side inside and stitch the together about 5/8" from the raw edge. (I use a running stitch and sashiko thread, but you could do it on a sewing machine)
Now, turn the cloth right side out (print on the top) and finger press the seam flat (no ironing!)
Smooth the fabric layers out, then stitch the two rows around the outer edges.
Before we leave this general information section here are two photos (borrowed from a different sampler) to review two sashiko basics:
1. Putting many stitches on the sashiko needle at a time. This will give you straighter more even stitching, and it goes along much faster.

2. Sashiko stitching is dense so it is important to keep you stitching threads quite loose and to leave a small loop at the end of every line you stitch. I also stop frequently and holding the edges of the fabric on opposite sides, pull firmly. Repeat in several places. This will very likely pull those small loops into the fabric so they disappear and that will make it possible for the finished cloth able to lay flat as the stitches accumulate in it.

Please select all options.